 |
| PIN ME {top (on sale for $24 + an additional 25% off!) // jeans // hoops} |
After getting multiple estimates, it would cost more to professionally paint my "problem child" than it would to simply buy a brand new table that matched our decor.
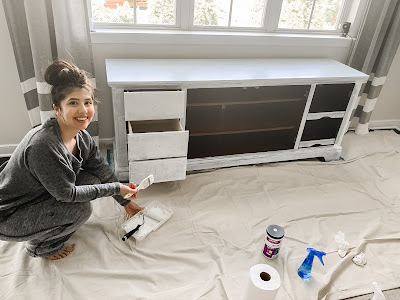
Enter Instagram and the never-ending home pages I follow. I heard a variety of bloggers/influencers sign the praises of Beyond Paint, but to be honest, I was hesitant. Could I tackle this myself? Would this miracle/no-prep-needed product actually work? Did I honestly have the time to deal with it? Although we were in quarantine, I was still working from home and it felt like the days were longer than ever before. With that, the more I was home, the more irritated I was by this non-cohesive piece. My hubby and I discussed it and came to this conclusion: worst case scenario, I messed the thing up completely and it had to be tossed; best case scenario, it looks great and we'd get a few more years out of it. I picked my intended "start" date and purchased my supplies accordingly.
I ordered Beyond Paint's Refinishing Kit from HSN, since it was one of the only sites that had white in stock. I highly recommend ordering the kit because everything I needed came in one box. You're also going to want to order the sealer to ensure your piece(s) holds up to every day wear and tear. So, here's the final verdict: We're thrilled with the results and the process relatively simple! It look me 2 entire weekends to complete the project. My only real issue was the dust accumulation (discussed below) and the trickiness of the glass doors.
Tips & Recommendations:
- For dark furniture pieces, like ours, I would recommend a separate primer. It took me 4-5 coats of white to cover the piece completely. If you're using a dark color, this shouldn't be a problem.
- Vacuum the piece before the sealer is applied. Do not use a duster! I ended up with all sorts of dust particles in my finished product. It's not noticeable to the naked eye, but I know they're there and it hurts my heart.
- Take off all doors and drawers where possible. This will help avoid drip marks and offer an even, easy canvas to paint on.
- Don't be alarmed when you see that the paint dries with a bit of texture. Apparently, that was done on purpose. The directions indicated that it helps hide imperfections and adds to the wearability.
- Storage your paint tray, brush and roller in an extra large ziplock. It can last up to a week.
- Add new knobs and/or hardware. It really completes and refreshes the piece!


I purchased a house in New Orleans a few days ago. Now I wanted to paint my house and that's why I'm searching for professional painters. Can you recommend professional painters New Orleans?
ReplyDelete